
Waterproofing your hiking boots stands as one of the most critical maintenance tasks for any outdoor enthusiast. Wet feet create discomfort, increase blister risk, and compromise thermal regulation in cold conditions. Regular waterproofing takes 20 minutes and delivers protection for months of hiking. Pat Falvey Irish & Worldwide Adventures recommends waterproofing your hiking boots before every major trek, from Carrauntoohil guided hikes in Kerry to Kilimanjaro expeditions in Tanzania.
Why Waterproof Your Hiking Boots
Waterproofing your hiking boots delivers three essential benefits that directly impact hiking performance and boot longevity. Understanding these reasons helps hikers commit to regular maintenance schedules.
Dry Feet Prevent Blisters and Discomfort
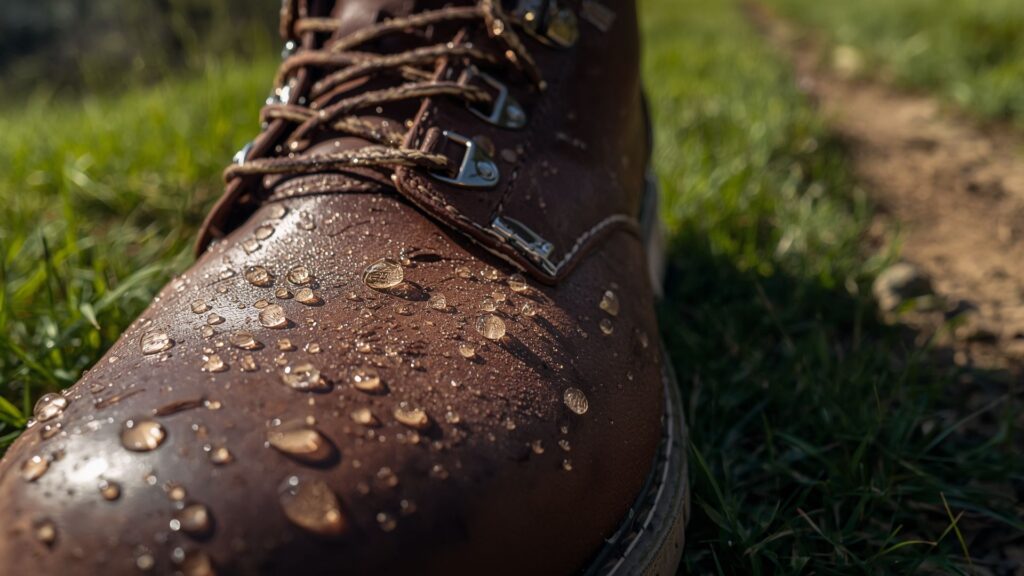
Moisture creates friction between skin and boot interior. Wet feet on multi-hour hikes increase blister formation by up to 300% compared to dry conditions. Blisters develop within 30-45 minutes of sustained moisture exposure during active hiking. Waterproofing your hiking boots creates a barrier against external moisture from streams, rain, and morning dew.
Dry feet maintain comfort across 6-8 hour treks. Hikers completing routes like the Carrauntoohil Devil’s Ladder experience variable terrain including bog sections and stream crossings where waterproofing proves essential.
Waterproofing Maintains Breathability and Odour Control
Boots with waterproof membranes like Gore-Tex require exterior waterproofing to function correctly. The outer layer repels water whilst the membrane allows moisture vapour from perspiration to escape. Re-waterproofing your hiking boots restores this balance and prevents odour-causing bacteria from developing in damp boot interiors.
Fresh waterproofing allows membranes to breathe properly during intensive activities. Hikers preparing for Everest Base Camp treks need boots that regulate moisture across 12-14 hour trekking days in varying altitudes and temperatures.
Regular Waterproofing Extends Boot Lifespan
Quality hiking boots cost £120-£300 depending on specification. Regular waterproofing protects this investment by preventing leather degradation, seam deterioration, and material breakdown. Boots maintained with quarterly waterproofing last 50% longer than neglected footwear.
Cleaning and waterproofing your hiking boots after muddy conditions removes corrosive particles. Salt from winter roads and minerals from mountain streams accelerate material breakdown. Protective waterproofing layers shield against these elements. Proper maintenance means boots purchased for Annapurna Base Camp expeditions remain serviceable for subsequent adventures.
When Should You Waterproof Your Hiking Boots
Waterproofing schedules depend on usage frequency and exposure conditions. Hikers need not waterproof after every outing, but specific indicators signal when treatment becomes necessary.
Test waterproofing by spraying water on boot surfaces. Water should form beads that roll off cleanly. Absorption indicates compromised waterproofing requiring immediate treatment. Check boots after particularly dirty hikes or when boots appear visibly soiled. Quarterly maintenance suits active hikers completing 2-3 treks monthly.
Pat Falvey Irish & Worldwide Adventures recommends waterproofing your hiking boots before major expeditions. Hikers preparing for Kilimanjaro treks or multi-day routes like Salkantay to Machu Picchu should waterproof 1-2 weeks before departure to allow proper curing.
Identifying Your Boot Material for Waterproofing
Different boot materials require specific waterproofing products. Using incorrect products damages boots or fails to provide adequate protection. Check manufacturer specifications or boot tags to identify material composition.
Full-Grain Leather Boots
Full-grain leather boots use wax-based waterproofing products. These boots appear smooth with uniform colouring and represent traditional mountain boot construction. Apply beeswax or synthetic wax formulations. Wax-based products maintain leather suppleness whilst creating water-repellent surfaces.
Nubuck and Suede Leather Boots
Nubuck and suede present textured, slightly fuzzy surfaces. These materials require spray-on waterproofing formulated specifically for rough-out leathers. Wax products darken nubuck and eliminate the characteristic texture. Use silicone-based or fluoropolymer sprays that maintain material appearance.
Synthetic and Fabric Boots
Synthetic boots incorporate materials like nylon, polyester, or proprietary fabrics. These boots use spray-on waterproofing products designed for technical fabrics. Water-based sprays work effectively without damaging synthetic fibres or bonded seams. Apply multiple thin coats for optimal coverage.
Complete Process for Waterproofing Your Hiking Boots
Waterproofing your hiking boots follows a three-step process taking approximately 20-30 minutes active time plus drying. Each step builds on the previous to create lasting protection.
Step 1: Clean Your Boots Thoroughly
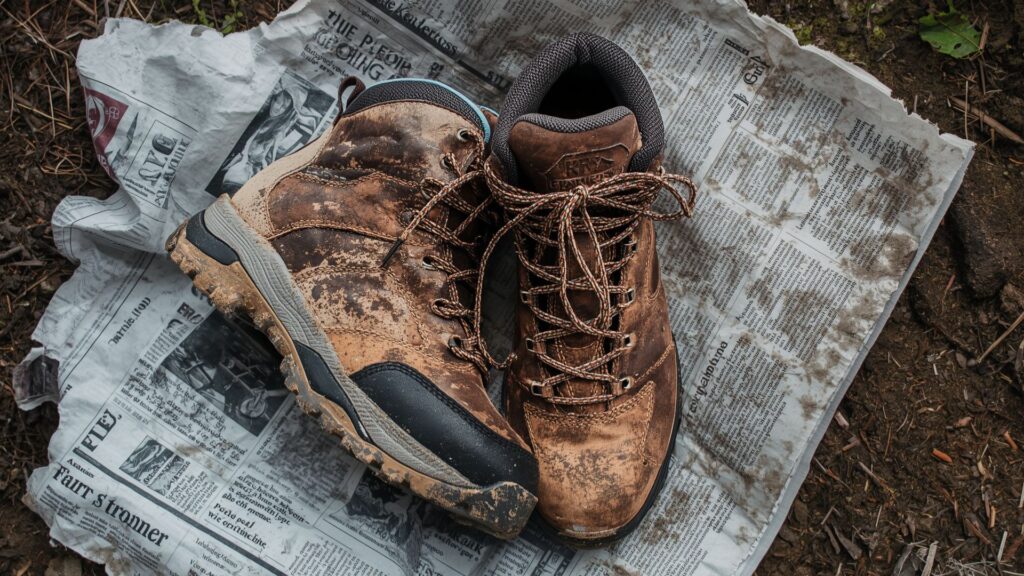
Clean boots accept waterproofing products effectively. Mud, dirt, and mineral deposits block product absorption and compromise protection. Remove laces and insoles before cleaning to access all boot surfaces.
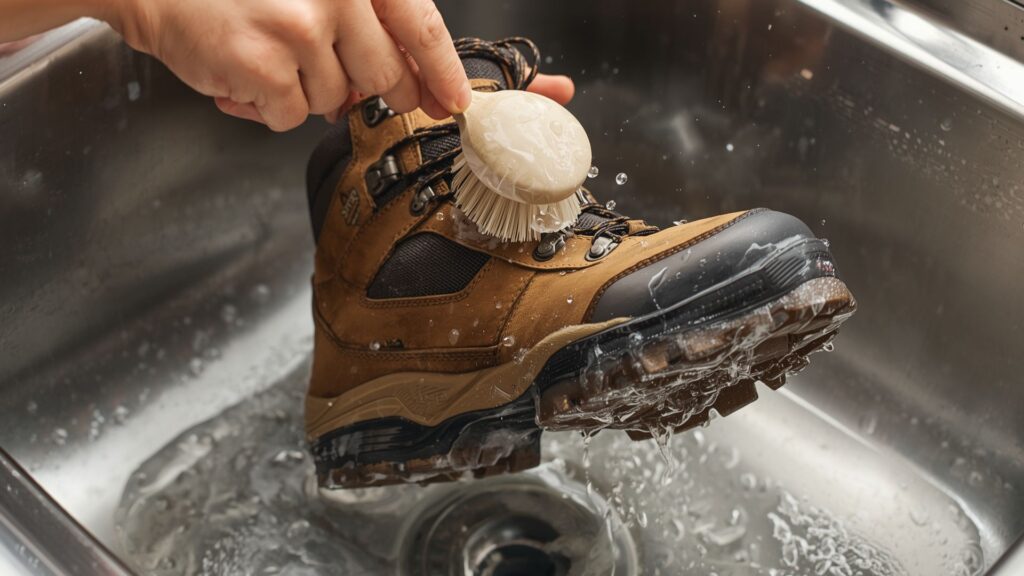
Basic cleaning suits post-hike maintenance. Use lukewarm water and a soft-bristled brush to remove surface dirt. Scrub in circular motions focusing on seams, welt stitching, and areas where upper meets sole. Rinse thoroughly with clean water.
Deep cleaning precedes waterproofing applications. Remove stubborn deposits by soaking boots in 2-3 inches of lukewarm water for 60-90 minutes. This loosens compacted mud particularly from challenging terrain encountered on routes like Mount Toubkal in Morocco. Use boot-specific cleaners for leather boots to remove oils and old waterproofing residue.
Avoid harsh detergents, washing machines, or aggressive scrubbing. These methods damage waterproof membranes, loosen adhesives, and accelerate boot deterioration. Let boots air-dry naturally after cleaning before applying waterproofing products.
Step 2: Apply Waterproofing Product
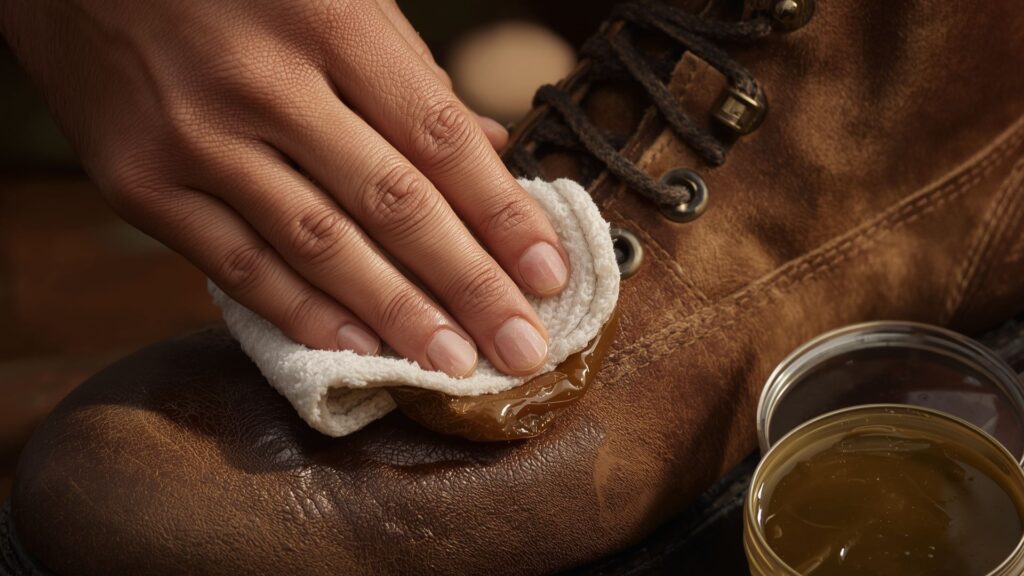
Apply waterproofing products to slightly damp boots for enhanced absorption. Different product types require specific application techniques. Test products on inconspicuous areas first if concerned about discolouration.
Wax-based products require warming before application. Hold containers in warm water for 3-5 minutes to soften wax. Apply with clean cloths using circular rubbing motions. Cover entire boot surfaces including tongue, heel counter, and toe boxes. Work wax into seams and stitching where water penetration occurs most frequently. Remove excess wax with dry cloths and buff to subtle sheen.
Cream-based waterproofers apply with supplied applicators or clean cloths. Spread evenly across all surfaces using consistent pressure. Creams penetrate leather fibres whilst creating surface barriers. Use cloths to work cream into difficult areas around eyelets and hardware.
Spray-on products require 15-20 centimetres distance from boot surfaces. Apply in thin, even coats using sweeping motions. Multiple thin applications outperform single heavy coats. Allow 5-10 minutes between coats for initial setting. Cover all surfaces including fabric panels, leather sections, and synthetic components.
Concentrate on high-stress areas including toe caps, heel counters, and flex points where materials bend repeatedly. These areas experience accelerated wear and require additional protection. Waterproofing your hiking boots properly means addressing every potential entry point for moisture.
Some products combine waterproofing with conditioning properties. Conditioning softens leather and maintains flexibility. Excessive conditioning reduces boot support and structural integrity. Condition leather boots 1-2 times yearly rather than with every waterproofing session.
Step 3: Dry Your Boots Properly
Proper drying completes the waterproofing process and ensures product effectiveness. Wet leather compromises support and breathability. Many waterproofing products require curing time to establish complete protection.
Dry boots at room temperature in well-ventilated areas. Position boots away from direct sunlight and heat sources. Radiators, fires, and heating vents damage adhesives, cause leather cracking, and degrade waterproof membranes. Natural air circulation provides optimal drying conditions.
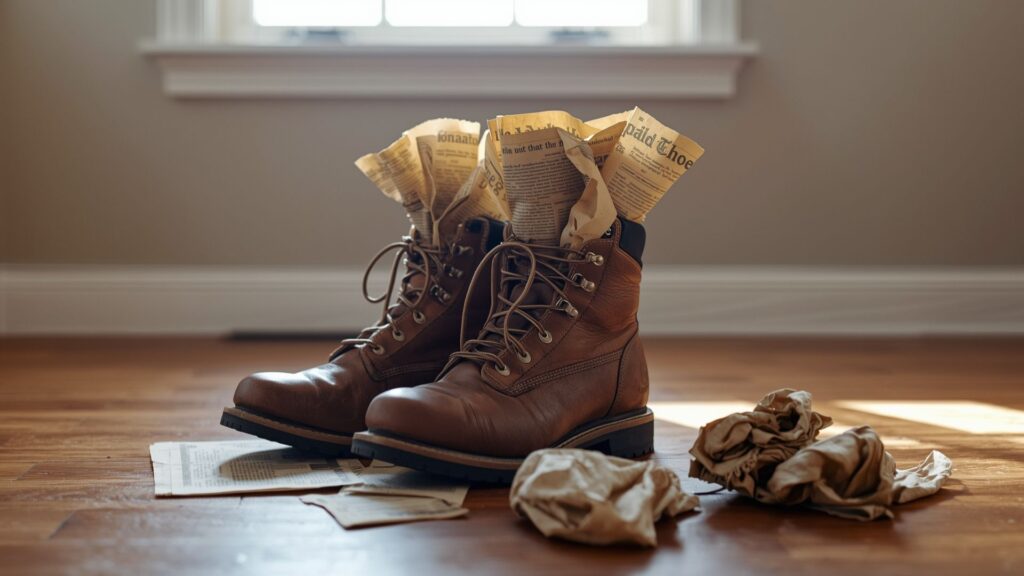
Accelerate drying by stuffing boots with newspaper. Change newspaper every 2-3 hours as it absorbs moisture. This technique draws water from boot interiors without heat exposure. Allow 24-48 hours for complete drying before wearing boots.
Store dried boots in cool, dry locations with stable temperatures. Avoid damp basements, hot attics, or direct sunlight. Proper storage between uses maintains waterproofing effectiveness and extends overall boot life. Well-maintained boots remain ready for spontaneous adventures whether exploring Kerry’s mountains or undertaking Camino de Santiago pilgrimages.
Common Waterproofing Mistakes to Avoid
Several mistakes compromise waterproofing effectiveness and potentially damage boots. Awareness prevents costly errors and maintains boot performance.
- Using incorrect product types represents the most common error. Wax products darken nubuck permanently. Spray products fail on smooth leather. Always match products to specific boot materials.
- Over-application wastes product and creates problems. Excessive wax clogs leather pores reducing breathability. Too much spray creates sticky residues attracting dirt. Thin, even applications deliver superior results.
- Applying products to dirty boots prevents proper adhesion. Waterproofing sits atop dirt layers rather than bonding with boot materials. Always clean thoroughly before waterproofing your hiking boots.
- Heat-drying boots damages adhesives and materials. This mistake shows particular prevalence after wet hikes when hikers want boots ready quickly. Patient air-drying preserves boot construction and waterproofing effectiveness.
Maintaining Boots Between Waterproofing Sessions
Daily maintenance extends waterproofing effectiveness and reduces required treatments. Simple post-hike care preserves boot condition and readiness.
Remove dirt after every hike using soft brushes and damp cloths. Address mud immediately rather than letting it dry and harden. Remove insoles and open laces to allow air circulation and complete drying.
Store boots loosely laced in cool, dry environments. Stuff with newspaper if damp from rain or stream crossings. Never store wet boots in sealed containers or bags where mould develops rapidly.
Inspect boots regularly for wear indicators including frayed stitching, sole separation, or damaged eyelets. Address minor repairs promptly before they compromise waterproofing or require professional intervention. Pat Falvey’s experience guiding expeditions demonstrates that preventive maintenance saves time and expense compared to reactive repairs.
FAQs
Waterproof boots every 3-4 months with regular use or when water stops beading on surfaces. Test by spraying water on boots. Immediate absorption means waterproofing has failed.
New boots include factory waterproofing lasting 20-30 hiking hours. Wait until this wears off before applying products, typically after 3-4 trips.
Waterproofing requires 24-48 hours complete curing. Spray products dry to touch in 2-3 hours. Wax solidifies in 4-6 hours. Plan 2-3 days before wearing.
No. Waterproofing restores water resistance to worn surfaces but cannot repair torn materials, separated seams, or damaged membranes. These need professional repair.
Yes. Remove insoles and laces before cleaning and waterproofing. This allows complete interior access and thorough drying. Wash insoles separately.