
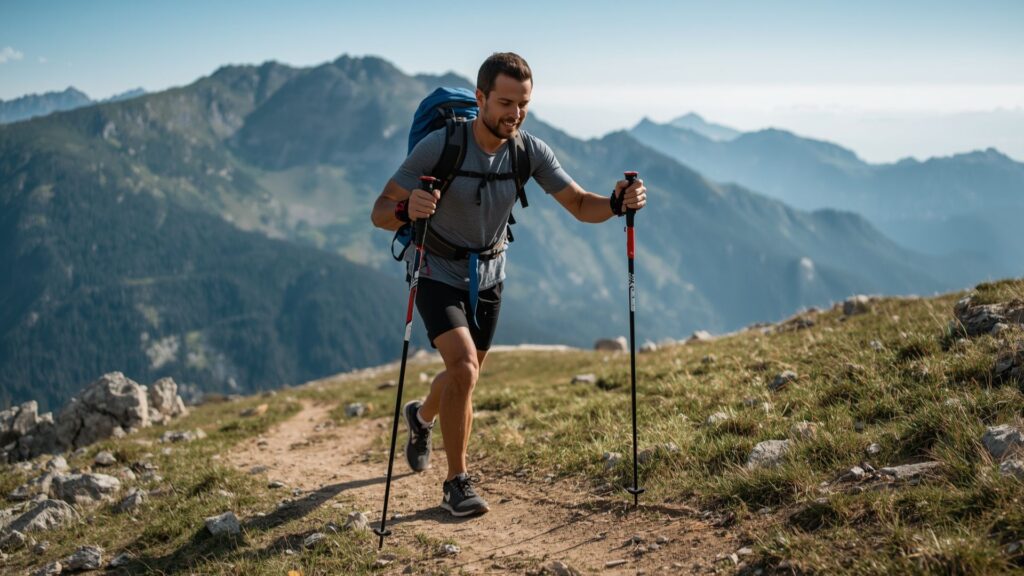
Trekking poles provide stability and reduce strain on joints during hiking, but only when used correctly. Pat Falvey Irish & Worldwide Adventures has guided thousands of hikers across Ireland’s mountains and international peaks over 30 years. This guide explains proper trekking pole technique, strap usage, adjustment methods, and safety practices for different terrain types.
How to Hold Trekking Poles Correctly
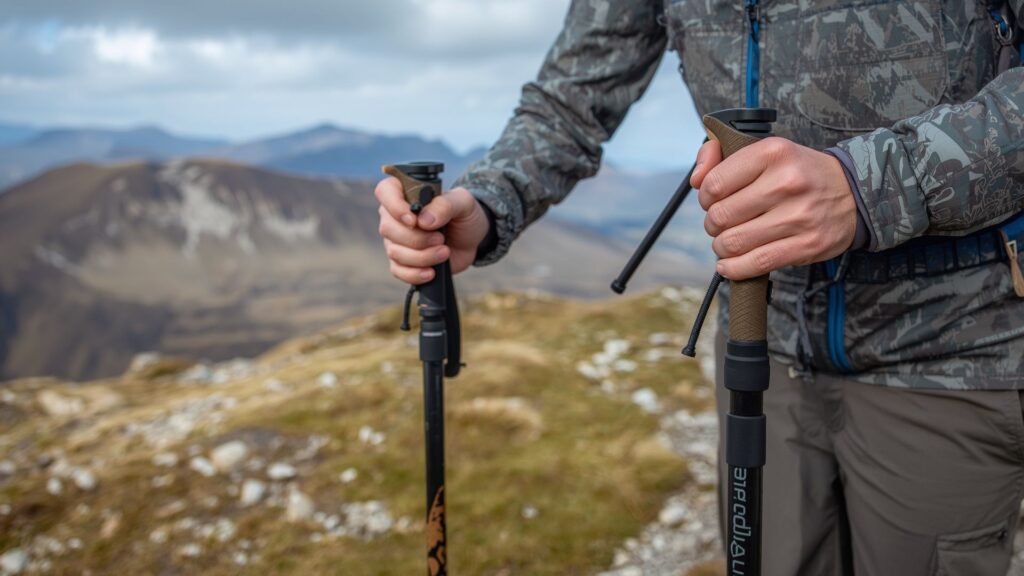
Most hikers grab trekking poles without understanding the proper grip technique. The correct method involves threading your hand up through the strap loop from below, then gripping both the strap and pole handle together. This technique transfers weight from your arms to your wrists and allows the poles to support your body weight with minimal effort.
When you hold trekking poles properly through the straps, you create a stable support system that removes approximately 64 tonnes of pressure from your knees and back over the course of a full-day hike. This calculation comes from biomechanical studies measuring the cumulative impact reduction during descent. The strap system works by distributing force across your wrist rather than requiring constant grip strength.
Understanding the Strap System
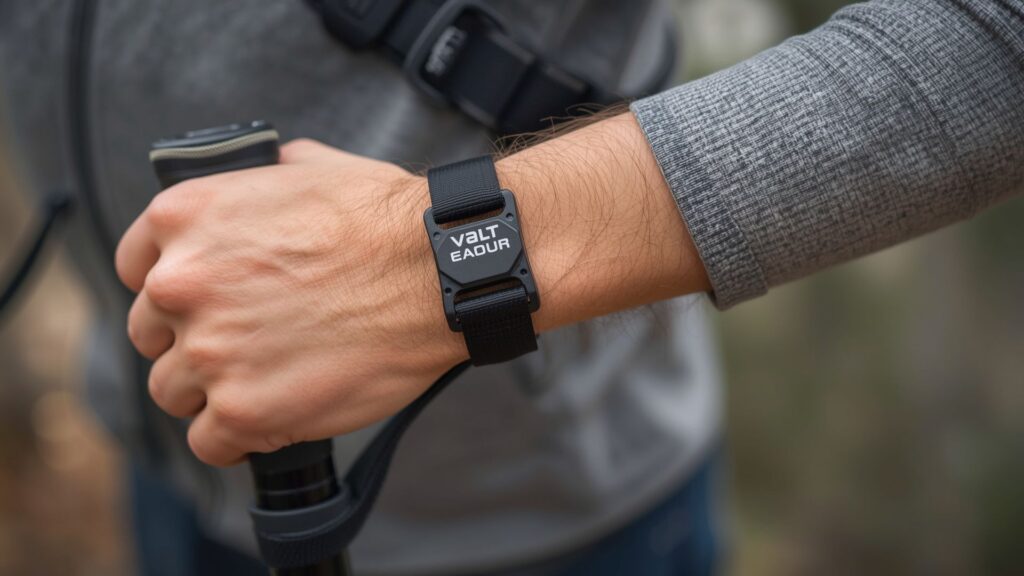
The wrist straps serve a mechanical purpose beyond simple security. Thread your hand upward through the loop so the strap sits snugly around your wrist. Adjust the strap length so you can release your grip on the pole handle while the strap still supports the pole’s weight. This configuration allows you to push down on the pole during each step without maintaining a tight grip.
The correct strap length positions the top of the handle at wrist height when your arm hangs naturally at your side. Straps adjusted too loose fail to transfer weight effectively, while overly tight straps restrict circulation and cause hand fatigue. Most quality trekking poles feature adjustable straps with quick-release buckles for easy modification during your hike.
Adjusting Pole Length for Different Terrain
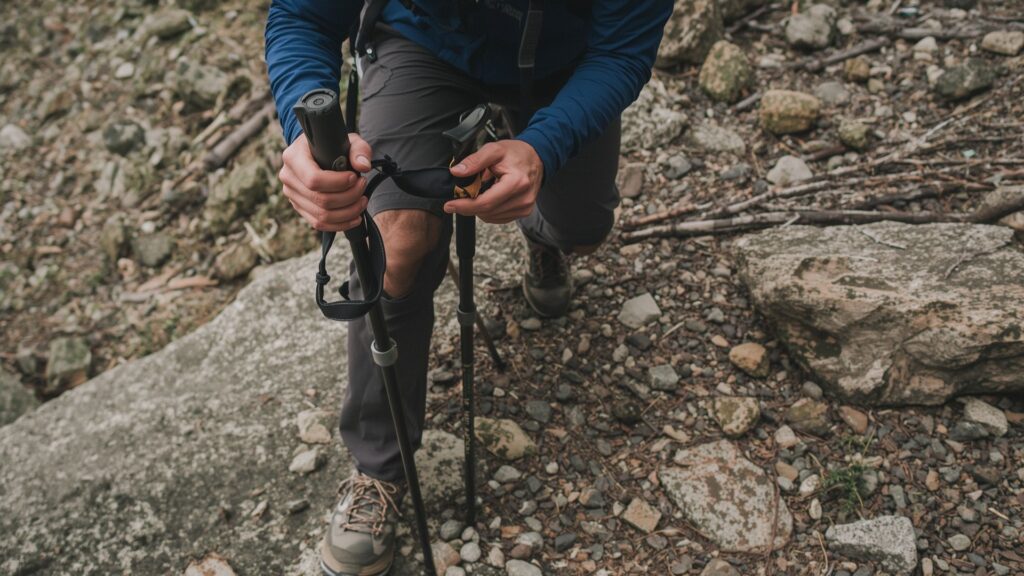
Pole length directly affects posture and energy efficiency. On level ground, adjust your poles so your elbow forms a 90-degree angle when you grip the handle with the pole tip touching the ground. This neutral position provides optimal leverage and maintains natural arm swing rhythm.
For uphill sections, shorten your poles by 5 to 10 centimetres to maintain the 90-degree elbow angle as the ground rises ahead of you. Shorter poles prevent you from reaching too high, which wastes energy and compromises balance. Many experienced hikers pre-adjust one pole shorter for continuous uphill sections on routes like the guided Carrauntoohil hikes where sustained climbs test endurance.
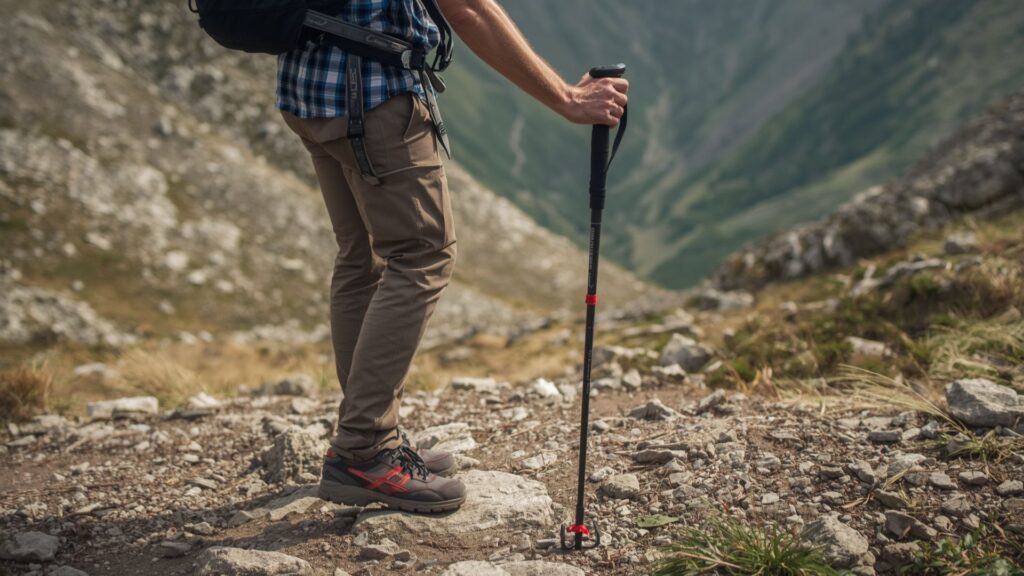
Descending Steep Slopes
Lengthen poles by 5 to 10 centimetres when descending to account for the downward slope. Longer poles provide forward stability and absorb impact before it reaches your knees. On very steep descents such as the Devil’s Ladder route on Carrauntoohil, remove your hands from the straps entirely to prevent shoulder injury if you slip.
The risk during steep descents comes from falling forward with your hands secured in the straps. A sudden fall can wrench your shoulder or break your wrist as your body weight pulls against the pole. Free hands allow you to release the poles instantly and use your arms to break your fall safely.
When to Remove Your Hands from Pole Straps
Three specific situations require removing your hands from trekking pole straps immediately. Scrambling over rocky terrain demands free hands for grabbing holds and maintaining three points of contact with the rock. During scrambles, shorten your poles and grip them by the shaft rather than the handle to reduce their effective length and prevent poking other hikers.
Technical descents with exposure require strap-free hands. Any section where a slip could result in a significant fall necessitates the ability to drop your poles instantly. Mountain rescue teams report that many upper body injuries during falls occur when hikers remain attached to their poles via wrist straps.
River Crossings and Unstable Ground
Remove your hands from straps before crossing streams or traversing boggy ground. If you lose balance and fall into water while attached to poles, the straps can trap you in an awkward position and hinder your ability to regain footing. The same principle applies to snow bridges, scree slopes, and any terrain where sudden ground collapse poses a risk.
Storing Trekking Poles on Your Rucksack
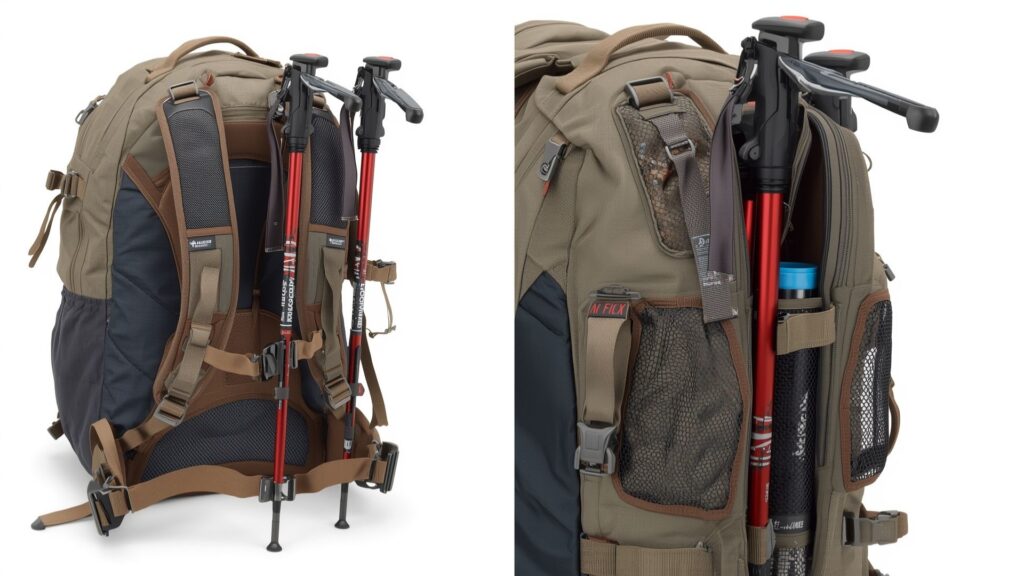
Always pack poles with tips pointing downward when storing them on your rucksack. Many rucksacks feature vertical compression straps or dedicated pole attachments on the sides. Insert the pole tips into the lower loop first, then secure the handles with the upper strap. This configuration prevents the tips from catching on branches or jabbing other hikers if you need to move through crowded areas.
The main problem with rucksack pole storage stems from inadequate attachment systems. Budget rucksacks often lack proper pole loops, forcing hikers to improvise with compression straps. When purchasing hiking gear for expeditions like Kilimanjaro or Everest Base Camp, verify that your rucksack includes reinforced pole attachment points.
Protecting Pole Tips During Transport
Rubber tip covers protect both your poles and other gear during transport. The sharp carbide tips can puncture rucksack fabric, tent material, or sleeping bags if left exposed. Most trekking poles include removable rubber covers that slip over the tips. These covers also reduce noise on hard surfaces and prevent tip damage when walking on roads or pavements between trailheads.
Benefits Beyond Balance
Trekking poles deliver measurable physical benefits that extend beyond improved stability. The 64-tonne pressure reduction figure represents cumulative force absorption over a typical eight-hour mountain hike. Research conducted by sports science departments demonstrates that poles reduce knee compression force by 25 percent during descent, which translates to significantly less joint wear over years of hiking.
Upper body engagement provides the secondary benefit of converting hiking into a full-body workout. Proper pole technique activates shoulder, chest, and arm muscles, increasing overall calorie burn by approximately 20 percent compared to pole-free hiking. This increased energy expenditure proves valuable during training for high-altitude expeditions where cardiovascular fitness determines success.
Rhythm and Pacing Advantages
Poles establish a consistent walking rhythm that improves hiking efficiency. The four-point contact pattern (two feet, two poles) creates a steady cadence that helps maintain pace during long approach hikes. Many guides recommend poles specifically for multi-day treks where sustained effort over consecutive days requires excellent pacing control.
The Mountain Lodge in Kerry serves as a base for learning proper trekking pole technique before attempting Ireland’s higher peaks. Pat Falvey’s mountain leaders demonstrate correct form during training sessions that prepare clients for international expeditions.
Pole Technique for Different Hiking Styles
Nordic walking technique differs substantially from mountain hiking pole use. Nordic walking employs an aggressive backward push that propels you forward, suitable for fitness walking on gentle terrain. Mountain hiking technique focuses on vertical support and stability, with poles planted slightly ahead of your body to test ground stability and provide braking force on descents.
For technical mountain routes, plant your poles deliberately rather than swinging them rhythmically. Each pole placement should test the ground ahead, particularly on loose scree or hidden bog. This cautious approach prevents twisted ankles and provides advance warning of unstable terrain.
Winter Hiking Considerations
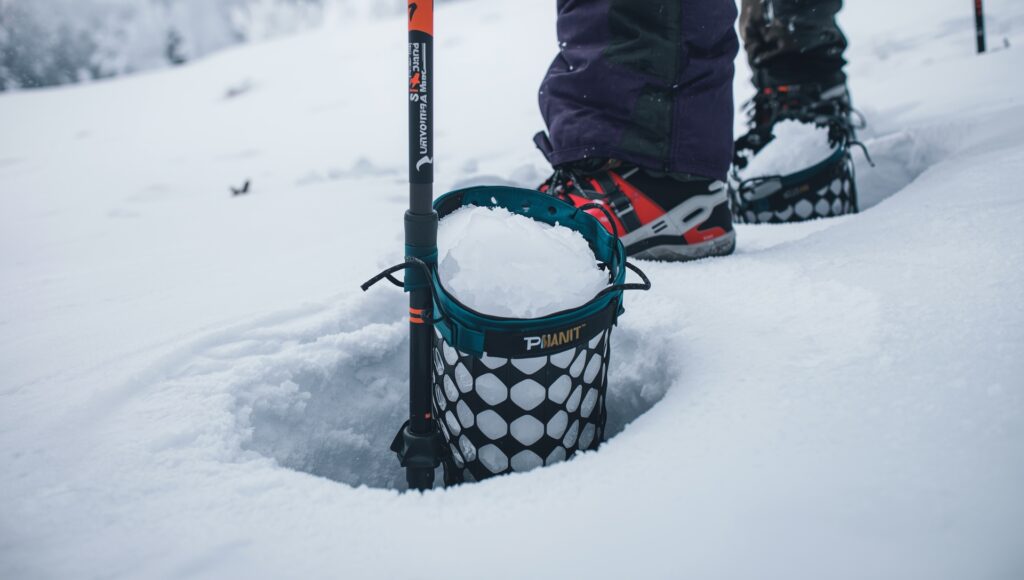
Snow and ice change pole dynamics considerably. Fit snow baskets to prevent poles sinking deep into soft snow. These wide circular attachments sit just above the tip and distribute weight across a larger surface area. Winter hikers also benefit from adjustable poles that allow quick length changes when transitioning between different snow depths.
Ice axes become necessary above the snowline on serious mountain routes, but poles still serve useful purposes on approach sections and during descent. Many mountaineers carry both tools, using poles for the majority of the route and switching to ice axes only for steep snow slopes requiring self-arrest capability.
Choosing the Right Poles for Your Needs
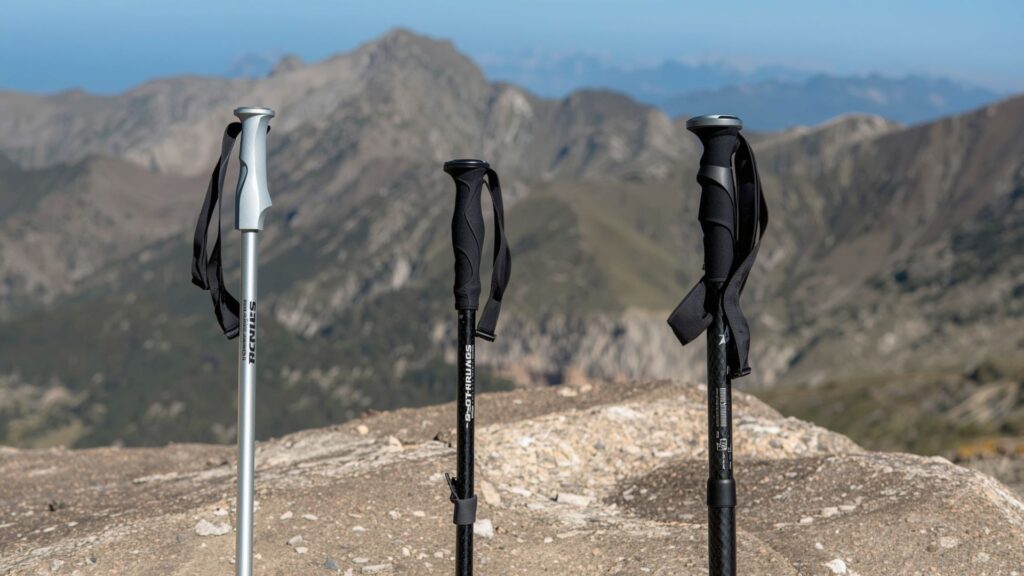
Pole construction materials affect weight, durability, and price. Aluminium poles provide excellent durability at moderate weight, suitable for general hiking and international expeditions. Carbon fibre poles weigh less but cost more and can shatter under extreme side loads. For expeditions to challenging destinations like Aconcagua or Island Peak, aluminium poles offer better reliability in harsh conditions.
Adjustable poles with telescoping sections provide versatility for varying terrain but add mechanical complexity. Fixed-length poles eliminate adjustment mechanisms entirely, reducing weight and potential failure points. Collapsible poles that fold into short sections fit inside luggage for international travel, essential for fly-in expeditions.
Handle Materials and Grip Comfort
Cork handles mould to your hand shape over time and wick moisture effectively. Foam handles provide excellent grip when wet but deteriorate faster than cork. Rubber handles suit cold weather use as they insulate better than other materials, though they can become slippery when wet. Most serious hikers prefer cork for its combination of comfort, durability, and all-weather performance.
Common Mistakes to Avoid

Gripping poles too tightly causes hand fatigue and defeats the purpose of the strap system. Your grip should remain loose, allowing the straps to bear most of the weight. The pole handle serves primarily to guide direction rather than support body weight.
Planting poles too far ahead forces you into an awkward forward lean that wastes energy and compromises balance. Poles should land slightly ahead of your leading foot, creating a triangle of support between your feet and the forward pole. This geometry provides stability without requiring excessive reach.
Neglecting Maintenance
Pole tips wear down over time, particularly when hiking on rocky terrain. Replace worn tips promptly to maintain proper traction and protect the pole shaft from damage. Locking mechanisms on adjustable poles require periodic cleaning to prevent dirt accumulation that causes slippage. Disassemble telescoping sections annually to clean and lubricate the adjustment mechanisms.